Showing posts with label crafts. Show all posts

Tuesday, February 18, 2014

Kiwi Crate

Have you heard of Kiwi Crate?   Check out their site if you haven't already.  For Christmas my mom and papa bought each of the kids a crate and also one to share.  What I love is everything you need (with the exception of scissors and things like water) is in the box!  Each box makes several crafts centered around the same theme.  The kids getting all the supplies out and ready.
 
 
Sydney coloring the papers to decorate the tops.   Her crate was colorful inspiration.  Sydney's box included the tops, and supplies to make stained glass windows (with tissue paper, there may have been something else I am having a hard time remembering ). 
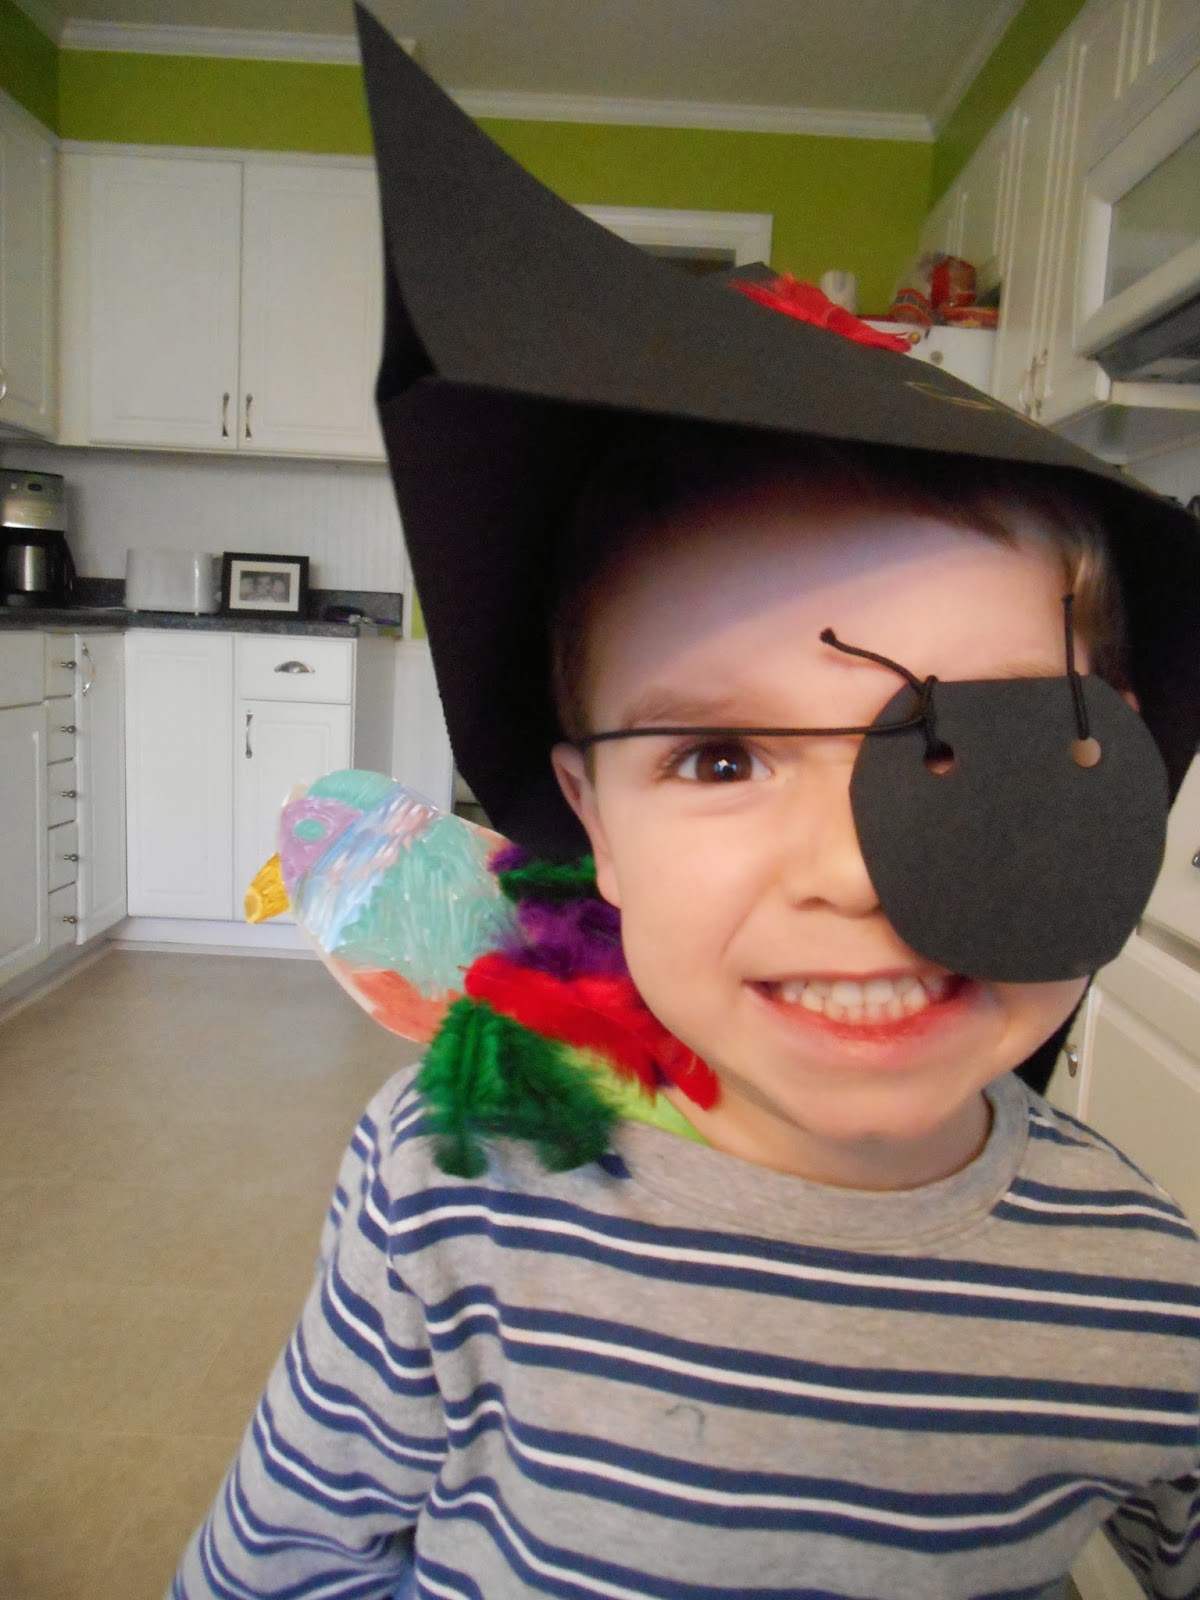
Griffin's crate was a pirate them, which is why he is wearing an eye patch.  He made a pirate hat, eye patch, a parrot, treasure map and decorate a  treasure box.


seriously the cutest pirate I have ever seen


We have one more crate reserved for a rainy day.  I was very pleased with this product and would recommend kiwi crates to everyone with kiddos who like to craft.  Also the site has craft and DIY ideas that you print. 

Monday, September 30, 2013

Raffia Pumpkins

I saw this idea on Kiwi Crate's website and I knew I wanted to give it a try.   Sydney helped me cut the raffia into manageable pieces.  (Griffin watched and ate chocolate pudding) 
raffia in paste
raffia wrapped around balloon- left in a bowl to dry (sorry sideways)
Our mantle
Finished pumpkins!  I love them, very fun and easy.  I like the orange color but a natural color would be cool too.

Saturday, August 10, 2013

Tissue Paper Night Lights

My kids love to craft (and so do I) so I am always looking for new craft ideas. I actually have a file of craft ideas and I have lots of craft supplies. I saw this idea on Kiwi Crate's website and I knew it would be fun. I had the jars, tissue paper and glue, I just had to buy the battery operated tea lights.

I let the kids cut their own squares of paper and then go to town on covering the jars. 


the finished product
we had so much fun and it was very simple and not too messy

 
I may actually make some myself to decorate our mantle at Christmas.  We could have added glitter or ribbon or sequins to dress them up a bit but we kept it simple today.  If you try this craft let me know and share how yours turned out. 

Wednesday, July 31, 2013

Kiwi Crate

Have you heard of kiwi crate?  I recently came across the website via someone's blog and wow I am impressed.  You can subscribe and get a monthly crate which is basically a box of supplies for 2-3 projects and crafts.  They have crates by theme such as pirates, bugs, fairies, medeval fun, robots, music, farmers market and more!   You can order a crate as a gift or of course for yourself.  They also have a great DIY category which is filled with crafts for you to do on your own.  Check out their website and let me know what you think?  What crates would you pick for your kids?  Griffin would love space hero or robots and Sydney would enjoy safari fun or fairies.  Hint hint mom I am thinking ahead for the kids birthdays or maybe even part of Christmas. 

Monday, June 17, 2013

Class and Family Rules

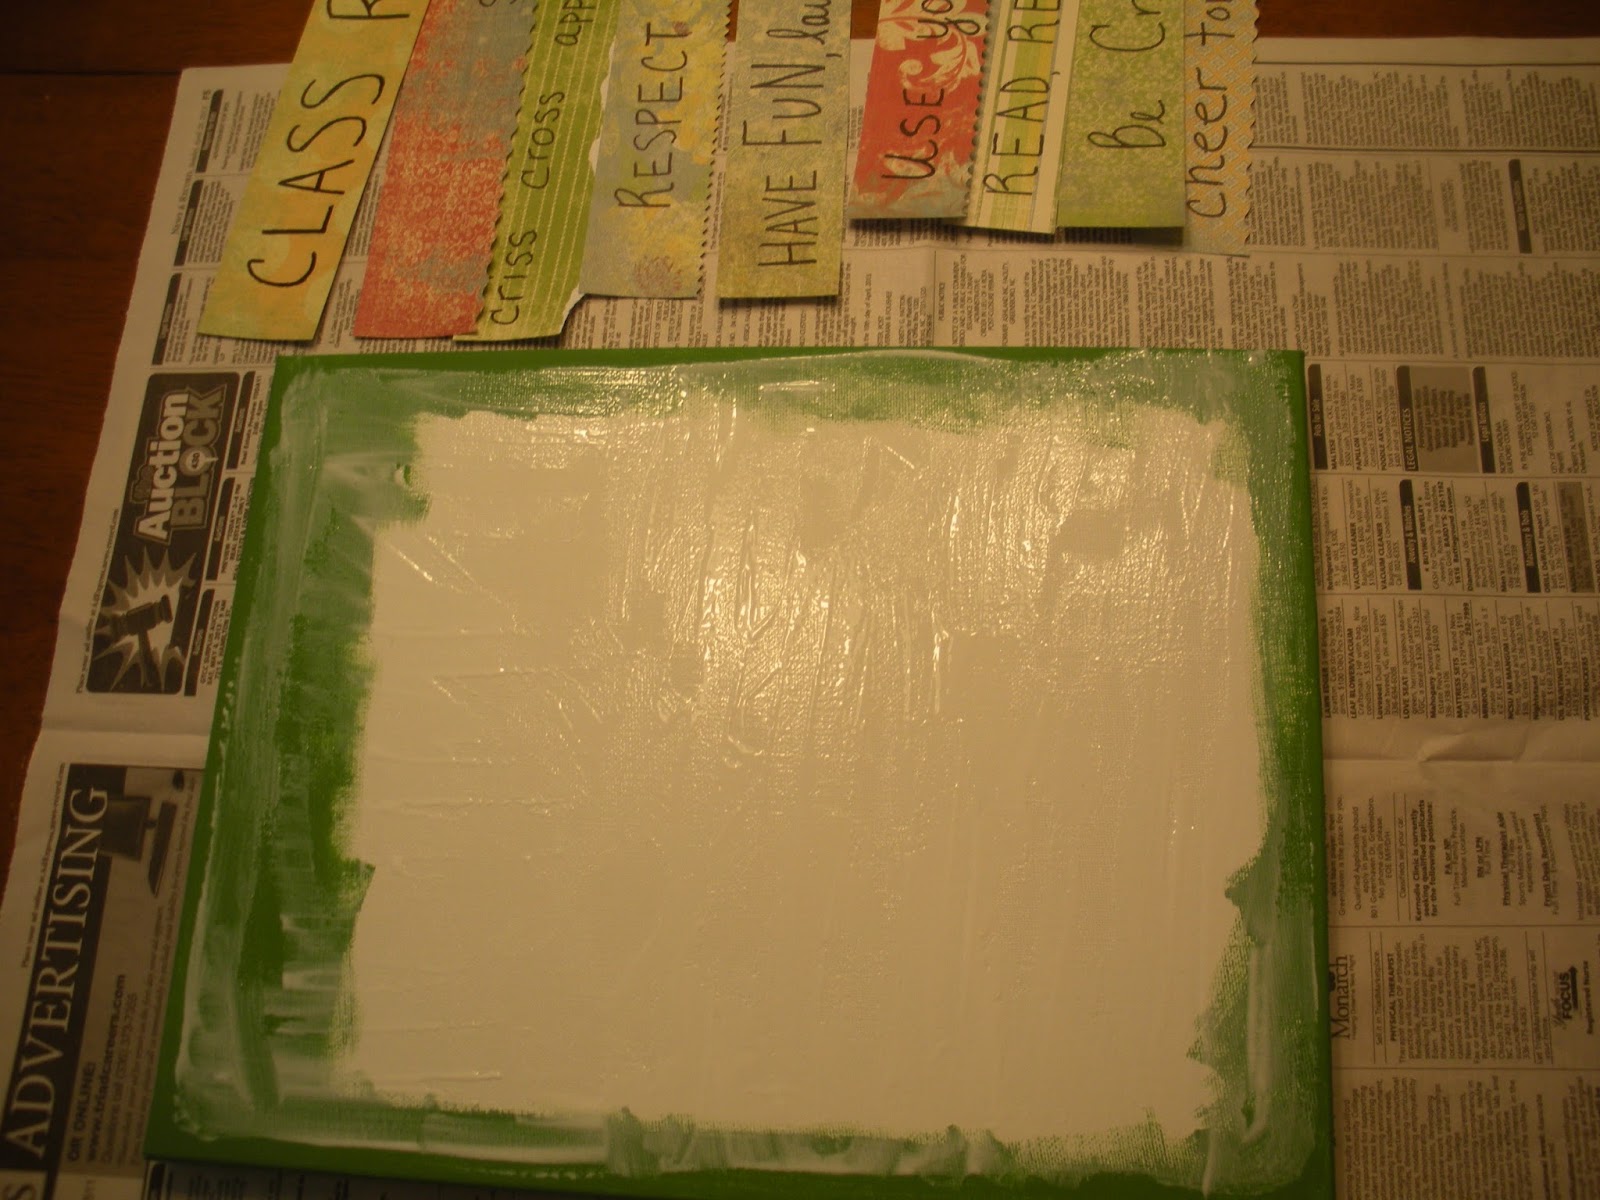
I saw this idea on The Pleated Poppy Blog and knew I wanted to give it a try.  So when the canvases were on sale at hobby lobby I bought a few.  I already had thick card stock and the modge podge- matte finish.  I bought a small container of acrylic paint to coordinate with the paper colors and painted the sides and edges of the canvas.  Then I started cutting stripes of paper and writing my rules.  I used permanent black marker and varied my fonts but you could use stickers or rub ons for the words.  The smaller canvas was easier because I did not have to glue the stripes of paper to fit the width.  I varied how I finished the edges, tearing some, using fancy scissors on others and cutting straight across on the rest.  When I was ready to glue my stripes on I covered the canvas with modge podge and started placing the stripes, overlapping just a tad.

Then I applied several layers of modge podge to the top, one at a time with a day of dry time in between each layer. 
This is the finished product that I made for Sydney's teacher.  I had Sydney write her name and the year on the back edge of the canvas in permanent marker.  Her teacher loved it!   I need to have Bill hang our family rules on the wall.   This picture is dark for some reason, sorry.  I am planning to make one for a baby shower gift with a poem on it.  The ideas are endless. 

Thursday, December 27, 2012

Snack Necklaces

My sister Ashley, told me about making these necklaces with my niece and I thought it was such a neat idea.   I gave the kids fruit loops, pretzels (true confession I had bought chocolate covered pretzels but ate them one night before this project) and gummy life savers, plus yarn.
They threaded the snacks on the yarn.
Griffin needed a bit of help.

Then we took a few pictures and watched a movie, eating our snacks off the yarn.  So fun and good fine motor skill practice.


Tuesday, November 27, 2012

Jewelry frame

I made this frame for my jewelry.  I found a bargain frame at Salvation army, removed the picture, spray painted it brown and using a staple gun attached chicken wire to the back.  I love having my earrings and a few necklaces displayed. 

 
Have you made anything lately?


Wednesday, November 7, 2012

Halloween Party

I made these little witches hats for my office- a striped shortcake fudge cookie, a little frosting on a Hersey's kiss to make it stick and then decorate with frosting, yummy and adorable
Karla and I- class party moms
I was the cat and the hat -everyone at my office dressed up
Sydney with the owl she made
we used a brown paper bag, crepe paper, white cupcake liners, wiggly eyes and card stock- orange for the beak
We let the kids decorate sugar cookies with orange frosting and yummy toppings
Mrs Fearnside reading a Halloween book to the class
We had a fun party and we are already planning the Christmas party!

Tuesday, November 6, 2012

crafts

I was inspired to make a few crafts- first this give thanks banner.  I used burlap that I bought by the yard at Hobby Lobby, card stock and letters that I traced with stencils and cut.  I used a glue gun and attached the burlap squares to twine and hung it across our mantel. 
For my H sign I painted a canvas black, cut burlap and scrapbook paper.  I painted a wooden H and bought an embellishment. 

Monday, August 6, 2012

Liquid Kaledescope

This is one of the kitchen science experiments we did at VBS.
Supplies:
shallow dish, for instance a pie pan or circular cake pan
whole milk (must be whole milk due to fat content)
food coloring, several colors
dawn dish soap
toothpicks


Fill dish with enough milk to cover the bottom.  Allow milk to settle, try not to bump the table or the dish and put a drop of food coloring in the milk, using different colors scatter your drops.  Then dip the end of a toothpick in the dish soap and put the toothpick in the middle of each color drop.  The color should spread out when you took the drop with the soap.  What is happening is that the fat in the milk is separating, taking the color with it, when the soap touches the milk. 

We talked about the scripture verse "Go into the whole world and proclaim the good news to every creature" Mark 16:15.  Just like the color spreads we can spread the good news of Jesus and his love for us to all the world.

Thursday, May 24, 2012

Summer list

I was inspired by Lisa to make a summer list.   I love how her canvas turned out but I wanted to be able to transfer our list to my scrapbook once summer is over so I just used a 12x12 card stock. 

We are ready for a fun summer!

Do you have a summer to do list?

Friday, May 11, 2012

Pinwheels

Ever since I saw this post on Lisa's blog I have wanted to make these pinwheels and I finally got around to it!  Aren't they whimsical and fun.  I used 2 sided card stock I think 6x6 inches and they were super easy.  I used my scrapbook hole punch and brads to fasten.  Then I spruced up a vase using a little sparkly tulle and made a pinwheel bouquet.  Just a little fun color for the sun room.  You could use these to decorate for a party and stick them in mason jars or in the ground.  I may make some with red, white and blue paper for the 4th of July! 


If you make some link up with me so I can see how they turned out!

Friday, April 6, 2012

Homemade Tutu

I saw this idea on another blog and decided to try to make a tutu from tulle myself
This pink one is for Sydney

this one is for a little girl yet to be born, I went to her baby shower Saturday

it was rather easy, all you need is elastic ( I think I used 1/2 inch?), tulle and ribbon
fun for dress up!

Wednesday, April 4, 2012

Resurrection of Jesus- preschool activity

I have mentioned before that we get the Thriving Family publication by Focus on the Family and it is full of great articles, reviews and activities.
This month there is a great activity for preschoolers (and adults).  The kids and I will be doing this together on Friday.

Supplies:
6 plastic eggs- each a different color
bread crumb, paper cross, strip of cloth, rock and piece of candy

As you tell the story of the Resurrection let your child open each egg and you can explain the meaning as you go along

1. Bread crumb: Jesus ate dinner with his friends (Luke 22:14-15)
2. Cross: The next day, Jesus died on the Cross (John 19: 17-18)
3. Strip of cloth:  He was wrapped in cloth and placed in a tomb (John 19:40)
4. Rock:  A stone was placed in front of the tomb (Matthew 27:59-60)
5.  Empty Egg: Jesus' friends came to the tomb and saw the stone has been moved.  The tomb was empty.  (Luke 24:1-3)
6.  Candy:  Jesus is alone.  That is the sweet surprise of Easter.  (Matthew 28:5-6)

Encourage your child to retell the story in their own words.

Monday, March 26, 2012

Simple Things

Our kids love crafts and I am usually, okay ALWAYS in charge of crafts at our house.  Usually we need a craft on a rainy day because if the weather is anywhere near nice we are outside.
This was a Saturday in February while Bill was at work the kids and I made a birthday banner.
It was so fun and we left it up for the entire week- every morning when Griffin came down to the kitchen he told Bill "Happy Birthday Daddy"
You can make a banner for anything or just let the kids decorate a huge piece of paper like a mural.
We used washable markers and crayons.

Do your kids like crafts?  Care to share any ideas?

Tuesday, February 14, 2012

Bookmarks for Valentine's Day


I made these bookmarks and mailed a few to some special people in my life and I gave one to a few friends and all the girls at work.  I saw the idea here and I decided to use a colored card stock.  Aren't they sweet?
Happy Valentine's Day. 

Thursday, February 9, 2012

Valentines shirt

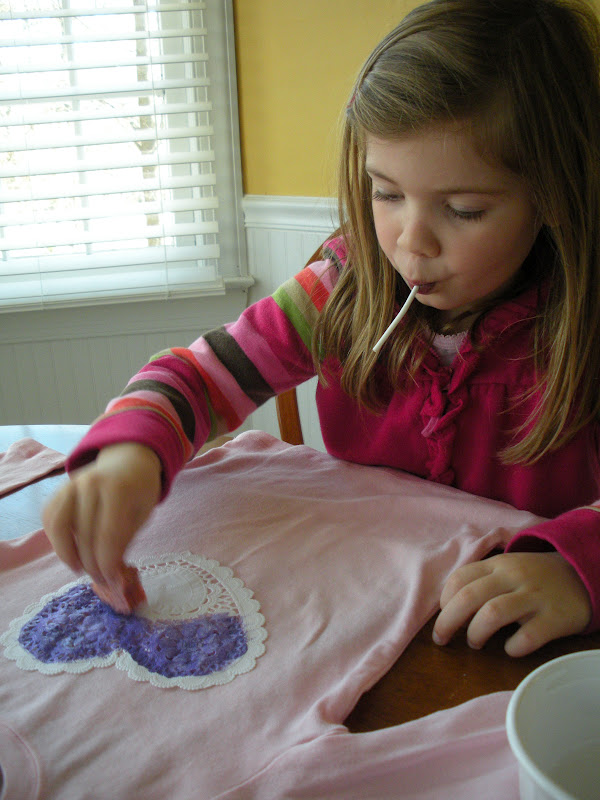
I saw this idea in a Disney Family Fun magazine so Sydney and I decided to give it a try.
I bought a solid long sleeved shirt at target (3.99 I think)
and doilies (you only need 1) and fabric paint
using glue stick or tape you secure doiley to the shirt, put a sheet of newspaper inside shirt so paint does not bleed through and then use a sponge or foam paint brush to dab the paint in the holes in the dollie

peel off doiley and let paint dry 72 hours
wash as instructed on paint
I have not taken a finished project picture yet but I will on Valentine's day
It was fun, very easy and now Syd has a shirt for Valentines but it is also something she can wear any day